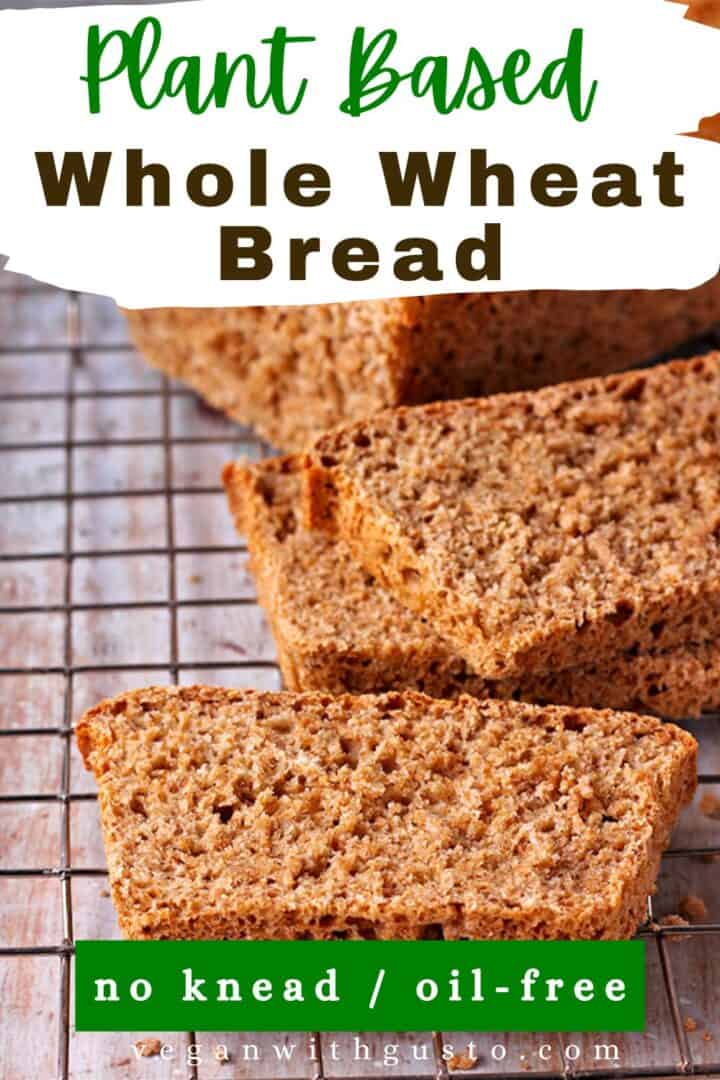
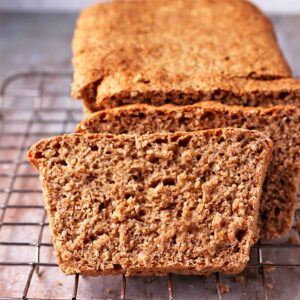
Your search for healthy vegan bread is over! This easy, no-knead plant-based bread recipe is a tried-and-true, oil-free wfpb (whole food, plant-based) homemade bread recipe with 5 simple ingredients, including water.
I'd like to gush that I make a loaf of this whole wheat bread every week, but that's not quite true. My husband makes it every week without fail. Sometimes, it's made with 100% whole wheat, sometimes with half whole wheat and half strong wheat flour. I can tell you that we always have a fresh or frozen sliced loaf in our house because we love toast for breakfast.
Table of Contents
Why You'll Love This Recipe
- This homemade vegan bread recipe and method frees you from expensive plant-based compliant bread you might (or might not) find at the grocery store.
- Great for toast, dipping in soup, making croutons, or sandwich bread.
- No need for a stand mixer or bread machine. This is a beginner's recipe for anyone with a bowl, spoon, loaf pan, and desire to make your own bread.
Recipe Ingredients and Notes
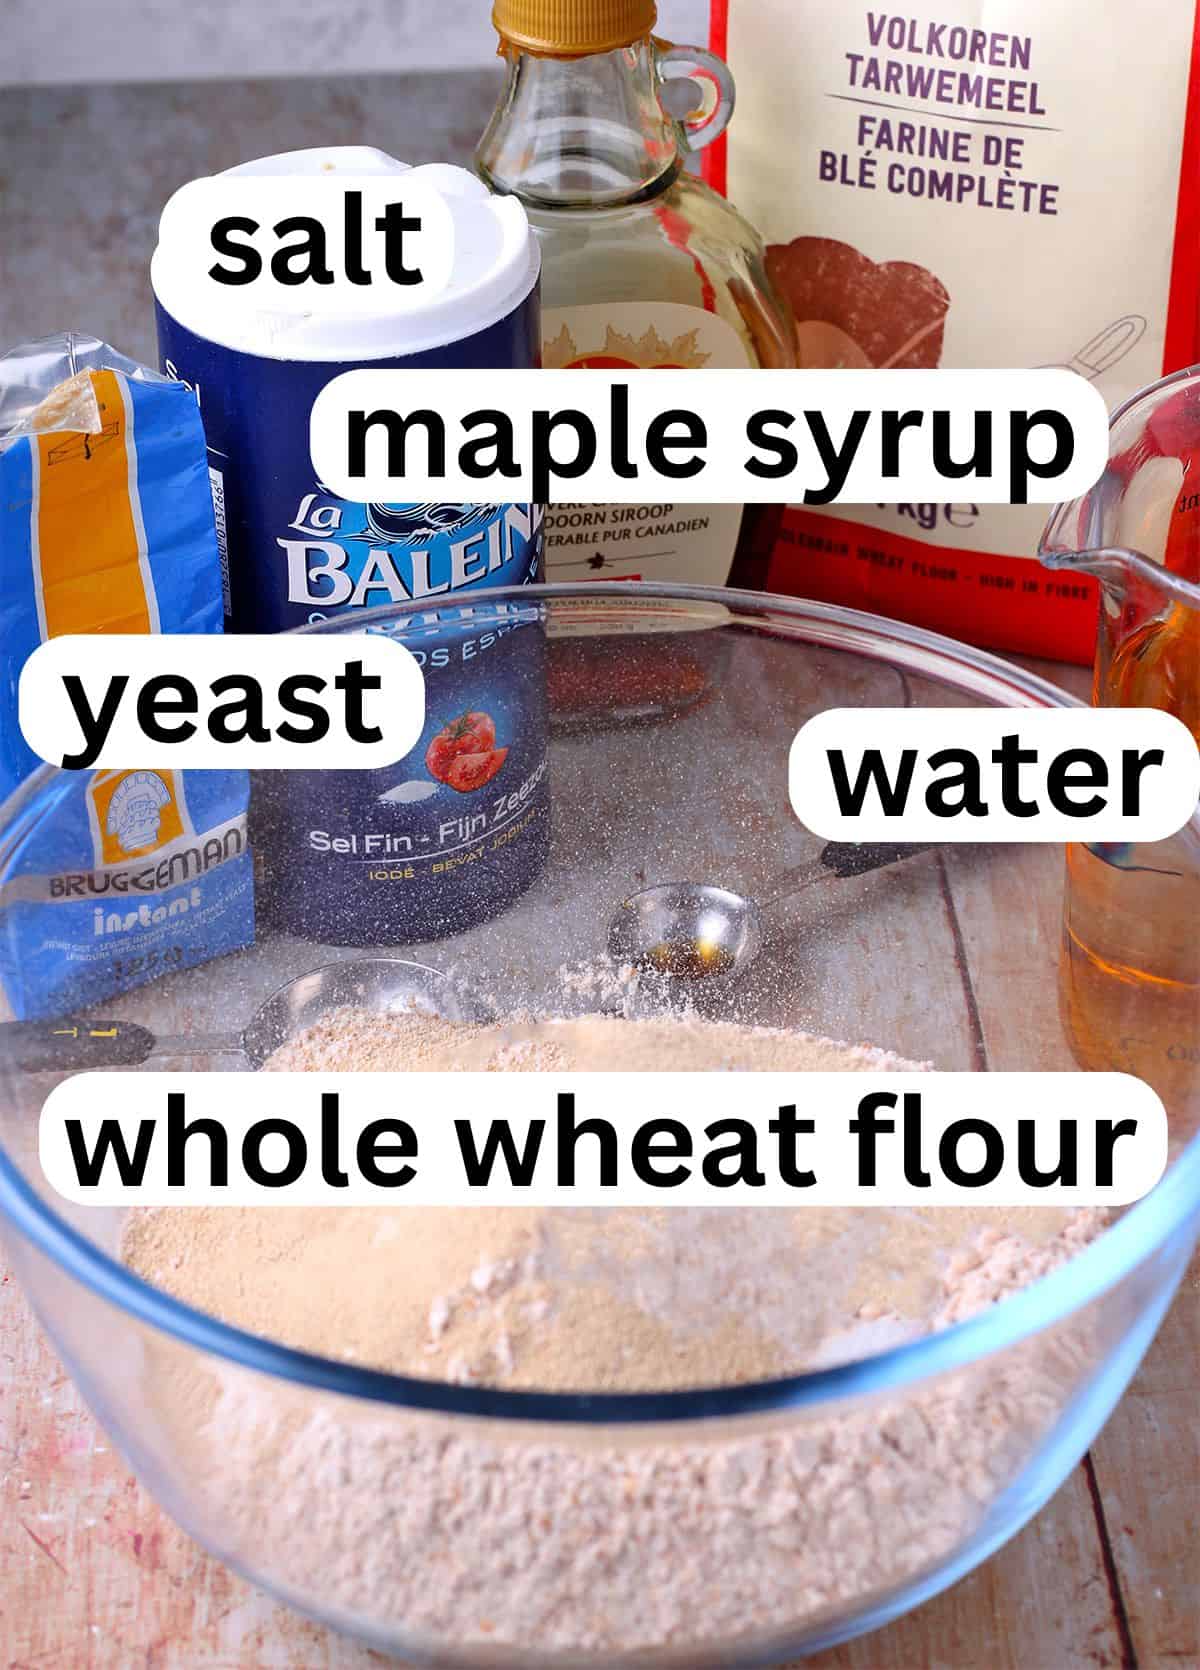
Flour. This is a whole wheat bread recipe at heart. However, it is quite forgiving, and I've used a mix of flour, including a cup of strong bread flour or oat flour. The best substitute for whole wheat flour is whole grain or multi grain flour.
Yeast. For best results, use instant yeast (guaranteed active) or fact-acting yeast (also known as rapid rise).
Maple syrup. I use just a touch of sweetener. Date paste is a good option because liquid sweeteners are easier to distribute. Date sugar or coconut sugar are good options.
Please see the recipe card at the bottom of this post for the complete list of ingredients, measurements, and instructions.
Recipe Variations
You'll need to experiment with using gluten-free flour. I recommend looking for brands with guidance on substituting for wheat flour.
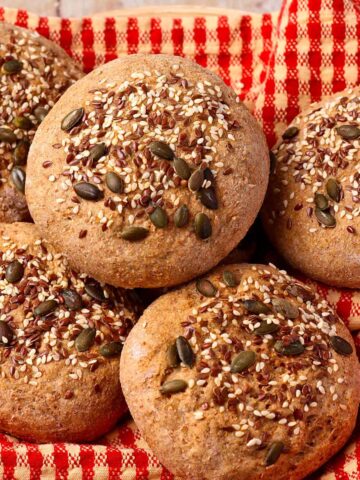
Top the bread with a mixture of pumpkin, sesame, or sunflower seeds to add a little crunch and flavor.Want to save this recipe? 🥣
Step-by-Step Instructions
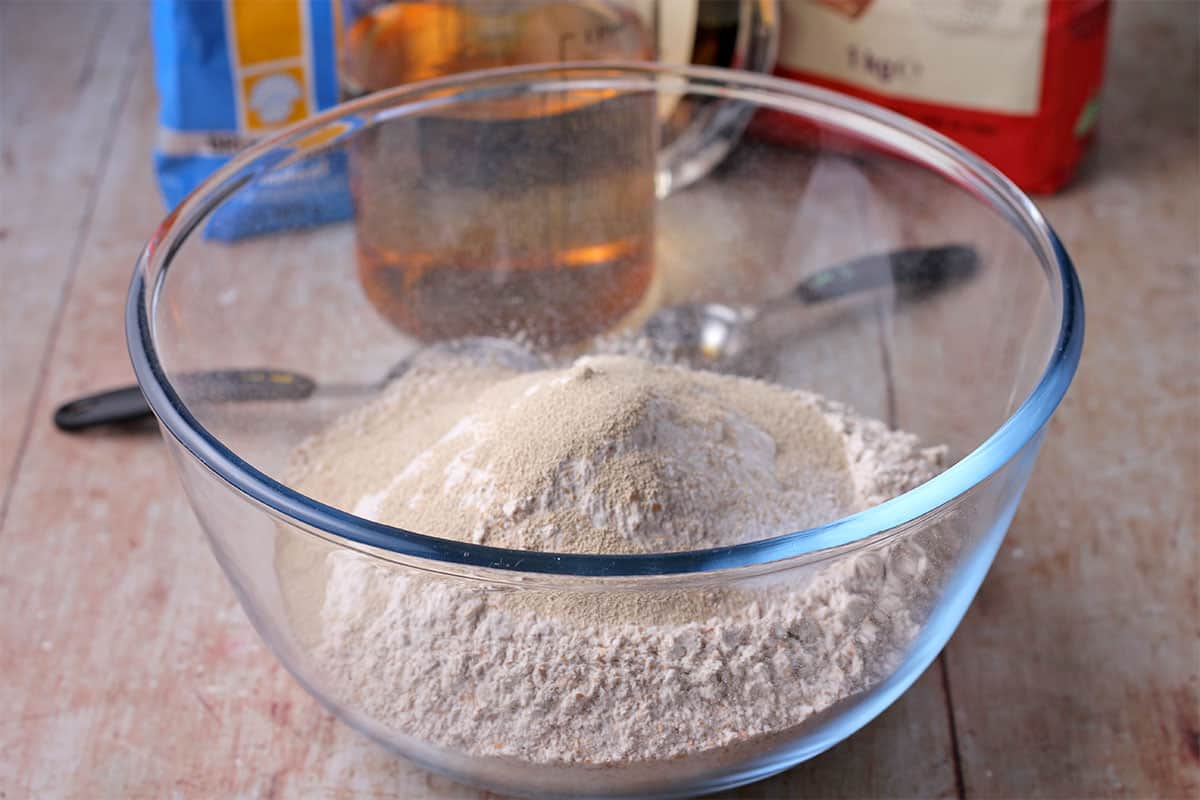
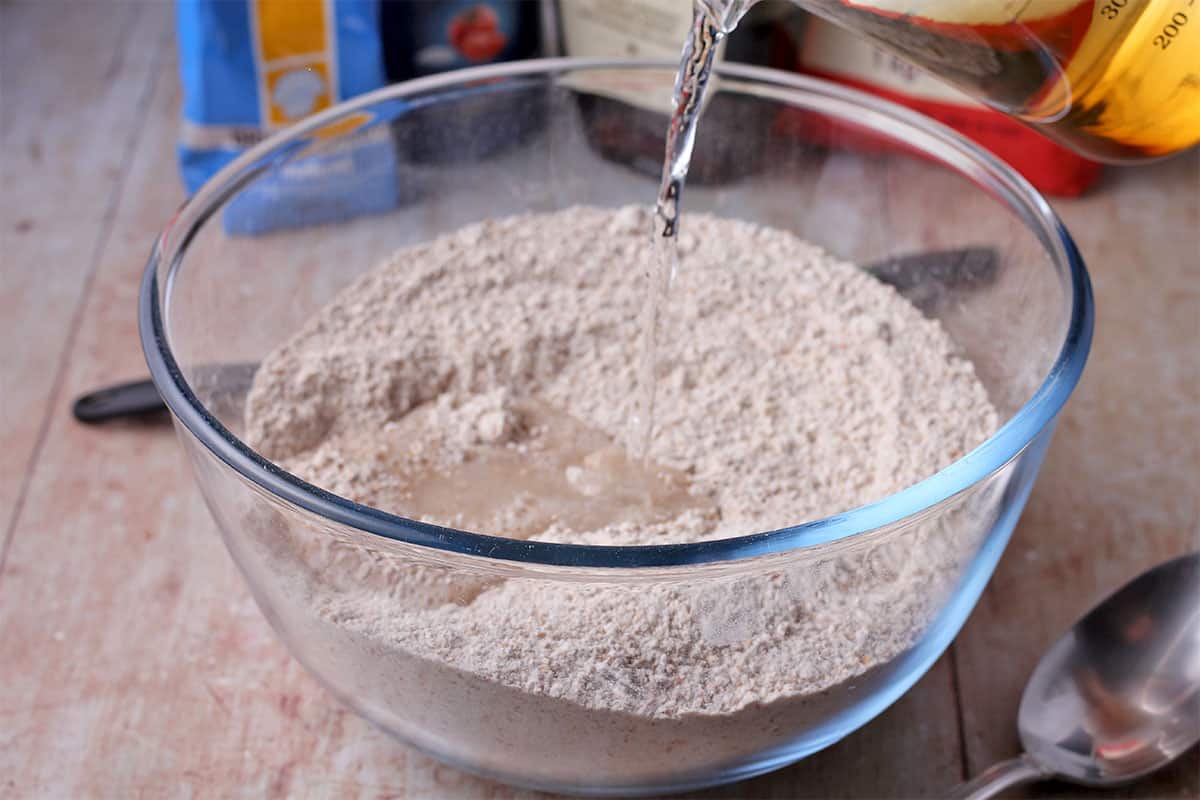
Step 1: Combine the dry ingredients in a large bowl. Stir warm water and maple syrup in a separate dish.
Step 2: Add the wet ingredients to the flour mixture.
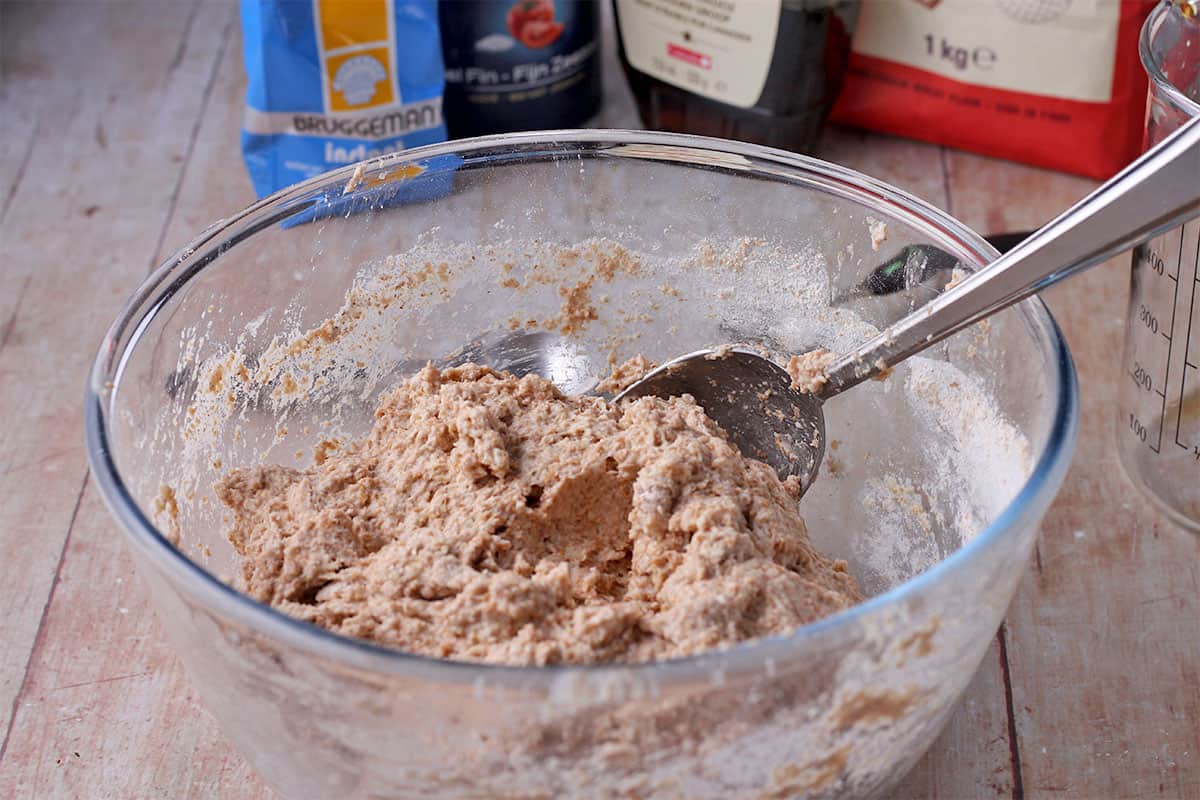
Step 3: Stir with a spoon, then use your hands to mix until all the flour is wet.
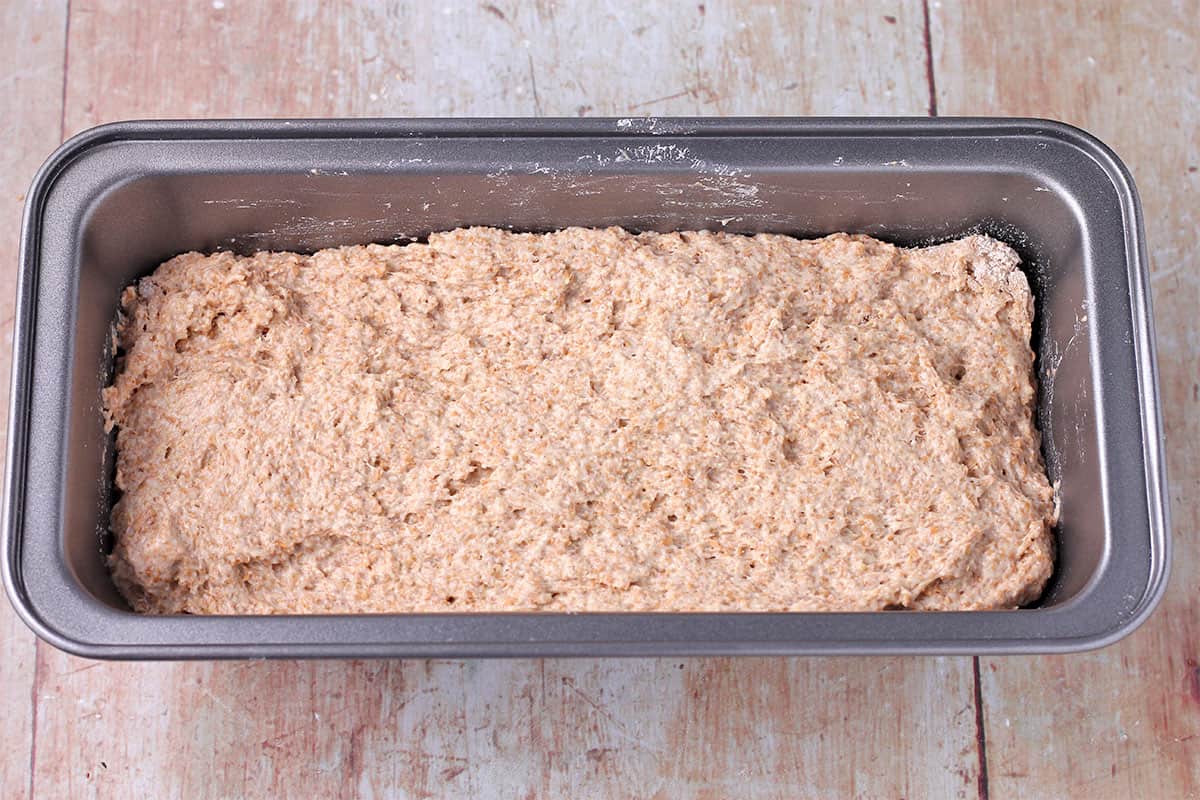
Step 4: Add the dough to a medium loaf pan. I used a 9x5-inch non-stick pan.
Step 5: Lightly cover with parchment paper or a tea towel. Place the pan somewhere warm and let the dough rise until about double (20 minutes).
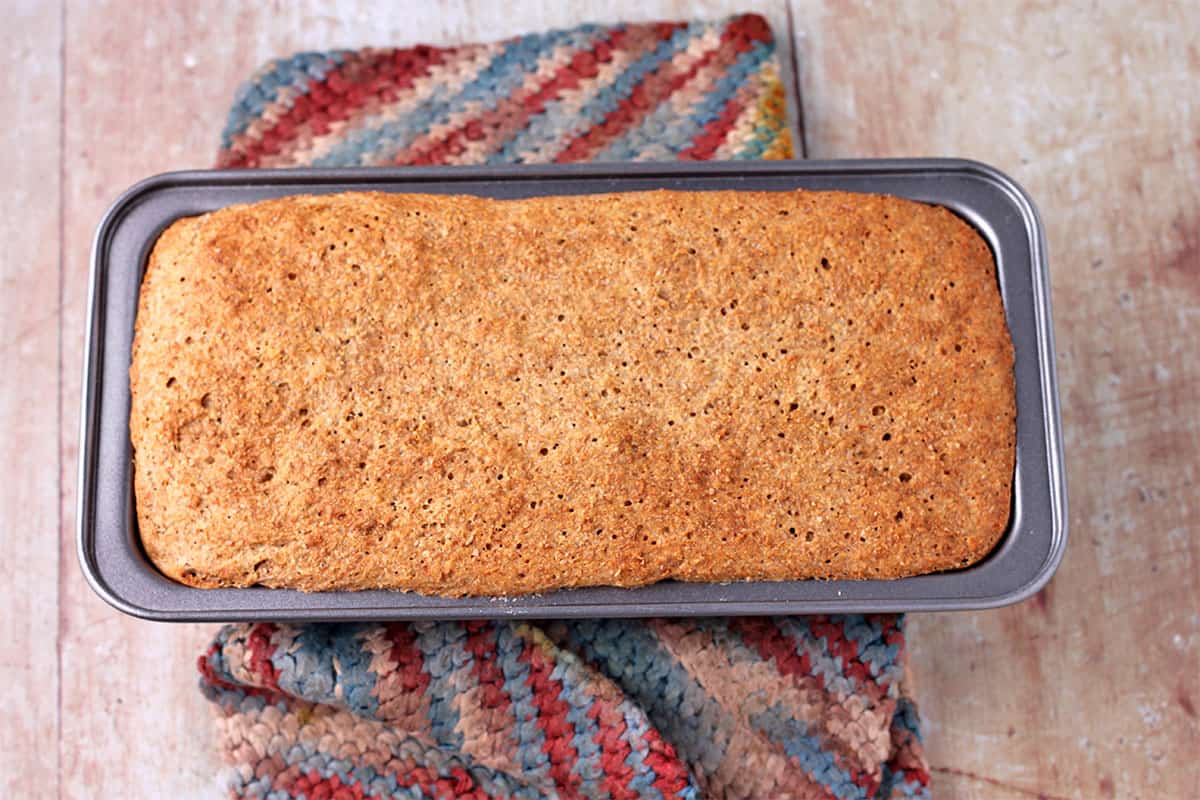
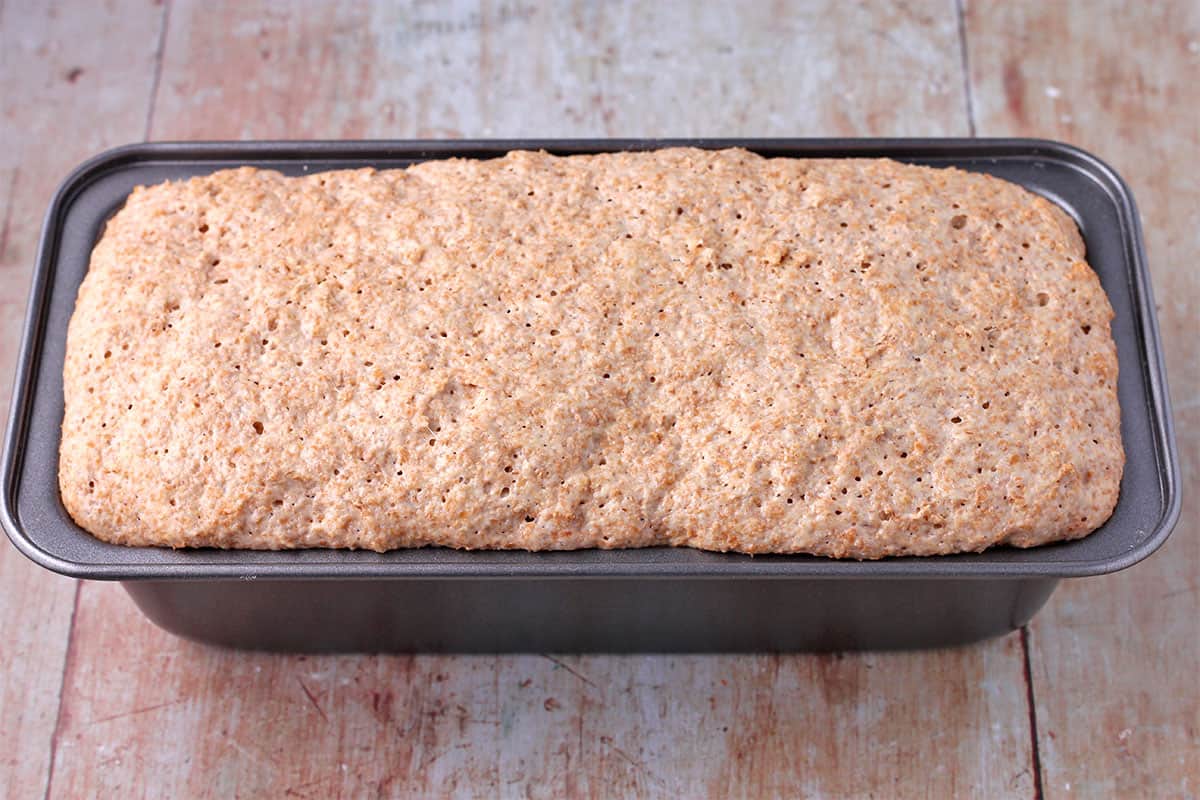
Step 6: Bake at 400 F (200 C) for 40 minutes until golden brown. Let it cool in the pan for a few minutes before transferring it to a wire rack.
Pro Tips

This recipe is all about heat. Here’s how to handle it:
- Use warm water, not hot or boiling. If the water is too hot, it will kill the yeast. I usually warm the maple syrup to room temperature before mixing it to keep the water warm.
- Make sure that your mixing bowl and bread pan are warm.
- Choose a draft-free, warm place to let the bread rise. A good hack is to warm your oven a little and then turn it off.
- Preheat the oven before baking the bread. If you're using the oven to raise the bread, take it out before cranking the heat (I speak from experience).
Covering the dough
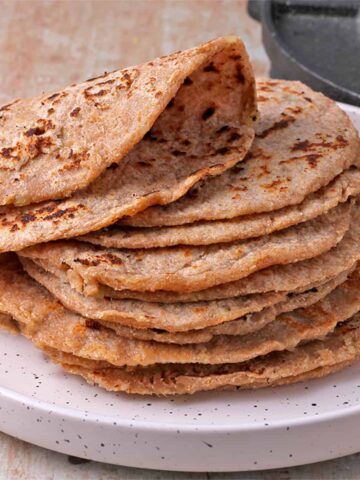
I want to call attention to covering the dough because I learned a valuable lesson with my first attempt at oil-free pita bread. And it's this - covering the dough keeps it from drying out, but rising dough can stick to a damp cloth. I've remedied this by lightly covering the dough with parchment paper or a dry tea towel. After hundreds of loaves, this method still works.
How to test yeast
If your yeast is in date, it's not usually necessary to test the yeast; however, if it's been compromised. like storing it above the stove or getting constant hits from the Instant Pot, or it's been open for awhile, you can test it. Here's how:
- Add the yeast to the warm water and maple syrup mix. The yeast mixture will bubble on the top, indicating the yeast is active.
Help! My bread is stuck in the pan
Despite your best efforts and a pan, you thought you could rely on, sticking happens. Here are some tips:
- Let the bread completely cool. The bread will contract as it cools, giving you more room in the bread pan.
- Run a butter knife around the edges of the pan. Be careful; a knife in any pan can leave scratches.
- Carefully flip the pan. I fondly remember my mom elevating bread over cans, but this can break the bread in the middle, so resist that temptation. You can elevate it a little, placing it over the edges of a baking dish or something not too high that the bread might come crashing down.
Denise's Tip: This is a little update. After years of making this recipe, our loaf pan lost some non-stick power. To solve this, we now line the bread pan with parchment paper. Let the bread rise, and then bake it for 30 minutes. Carefully remove the bread from the pan and remove the parchment paper. Return the bread to the pan and continue baking for another 10 minutes.
Storage and Freezing
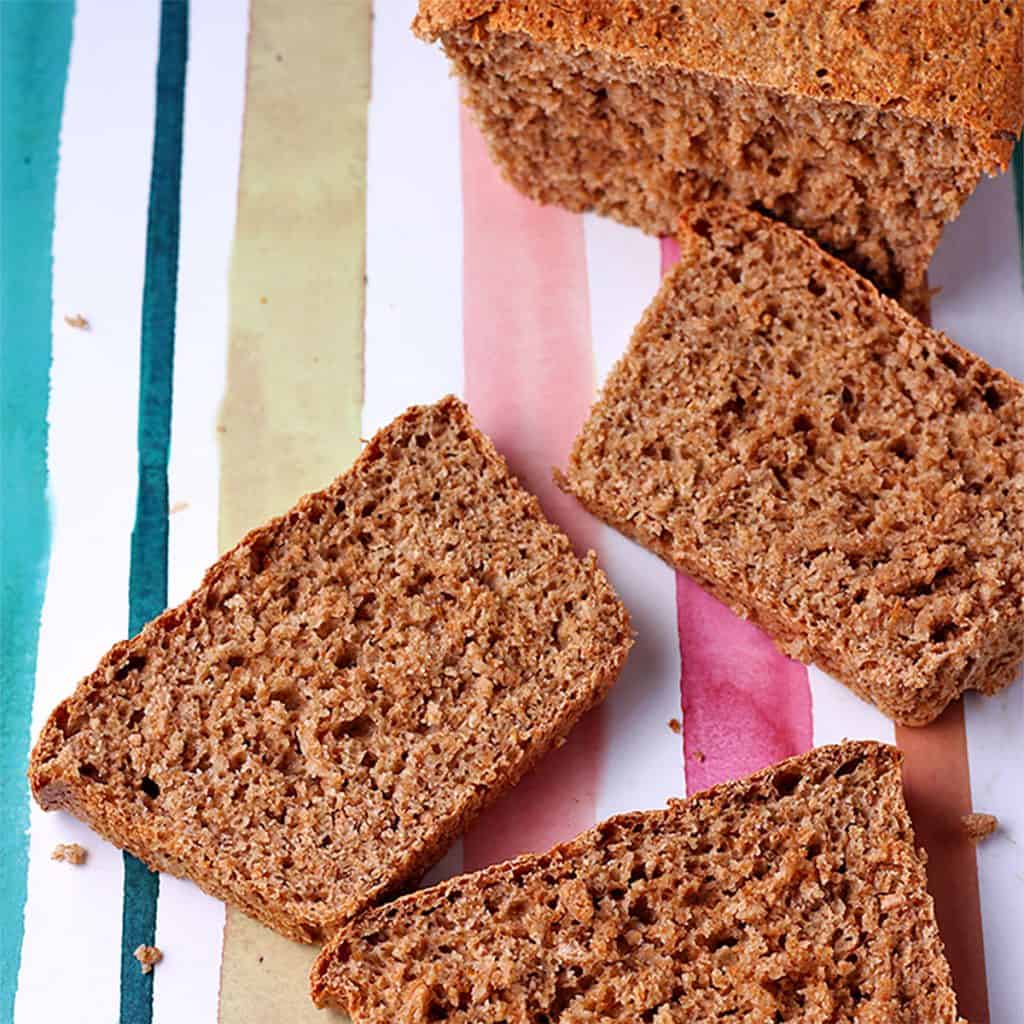
After the bread cools, wrap it in parchment paper and add it to an airtight container or sealed bag. Enjoy fresh bread for 3 days if stored on the counter or 5 if stored in the fridge.
To freeze bread, slice it first, separate the pieces with parchment paper, and add the slices to a freezer-friendly bag.
Frequently Asked Questions
Whole wheat and whole grain flour contain the whole grain (bran, endosperm, and germ). Whole wheat is made exclusively from wheat grains, while whole grain flour can contain other grains such as barley, rye, or corn.
Although we think of bread as being made with flour, which is plant-based, not all bread is vegan or plant-based. For example, some types of sugar are highly refined and may contain animal products. Many store-bought brands are made with highly or ultra-processed ingredients, like coconut oil or preservatives. If you're buying vegan bread, it is always best to read labels.
You can substitute all-purpose flour for bread flour; however, it may not rise as much. In this case, I'd recommend kneading the dough for a few minutes on a lightly floured surface to get as many gluten strands forming as possible.
This recipe works well in a Dutch oven; however, I encourage you to line it with parchment paper before rising or baking the dough. Ensure the dough mixture is warm before adding it to the Dutch oven.
Related Recipes
Hungry for more? Subscribe to my newsletter and follow me on Facebook, Pinterest, and Instagram for all the newest recipes!
👩🏻🍳 Recipe
No Knead Plant-Based Bread Recipe (Oil-Free)
Rate this Recipe:
Ingredients
- 4 cups whole wheat flour
- 1 tablespoon instant yeast
- ½ teaspoon salt
- 2 teaspoons maple syrup
- 2 cups water - warm not boiling
Instructions
- Start with a warmed mixing bowl and bread pan for bread-baking success.
- Mix the warm water and maple syrup in a small dish.
- Combine the flour, yeast, and salt in a medium mixing bowl.
- Slowly add the water mixture, stirring until all the ingredients are wet. You will use all of the water. Use your hand to mix at the end to ensure all the flour is wet.
- Add the dough to a non-stick loaf pan (I used 9 x 5 inch). If you want to ensure the bread won't stick to the pan, line it with parchment paper first.
- Lightly cover the pan with a tea towel or parchment paper and place the pan somewhere warm. Let the dough rise for 20 minutes until it's nearly double the original size.
- Preheat the oven to 400 F (200 C). Remove the covering from the bread ban and bake the bread in the middle of the oven for 40 minutes. Note: If you line the pan with parchment paper, remove it after 30 minutes. Place the bread back in the loaf pan and bake for another 10 minutes until golden brown.
- Remove the bread from the oven and place it on a cooling rack. Let it cool for 10 minutes before removing it from the pan.
Notes
- This recipe works well with a mix of flour, including whole wheat and strong wheat bread or oat flour. Whole grain flour is a good substitute for whole wheat flour used 1:1.
- To store bread, wrap it in parchment paper and place it in an airtight container or sealed bag. It stays fresh on the counter for 3 days or in the fridge for 5 days.
- To freeze, slice the bread, separate the slices with parchment paper, and place the slices in a freezer-friendly container. Toast to thaw. It freezes for 3 months.
- If the bread sticks in the pan, after cooling for 10 minutes, carefully run a butter knife around the edges of the pan. Flip the pan over. If the bread doesn't release, prop it over a baking dish or something not so high that the loaf will crash down and break.
Nutrition
Nutritional information is an estimation only.


Suresh Rao says
Thank you Denise for a sumptuous and an equally health quotient raising recipe
Denise says
You are more welcome! We've had great luck with this recipe. If you ever run into trouble on the rising front, check out my post for a few tips. Best, Denise.
Sheila says
Love this recipe, so easy. I used 3 cups stone ground whole wheat flour and 1 cup of dried spent grains, was amazing
Denise says
It's great to hear you love this bread recipe as much as we do. We are still making it at least weekly and it's SO much better than store-bought. Thanks for sharing your flour substitution. I'm going to try that next time.
Favi says
Lol plant-based bread. Almost all bread is plant based. You are not doing anything unique
Denise says
Thanks for checking out this recipe. Although bread is traditionally based on flour (which is plant-based), there are other ingredients often used in bread such as eggs, milk, honey, and royal jelly, casein and whey, and gelatin (and a few others) that are not plant-based. For this reason, we encourage everyone to carefully read labels or make bread so you know exactly what's in it.
Dr. V says
A lot of breads have egg and honey. However, what is unique is the oil-free part.
Denise Perrault says
Yes. This is specifically made without added oil. And it's been tested time and time again as we've been making it weekly for years.
Connie says
I’m just 3 weeks into a wfpb lifestyle & am loving it. I’m not a bread maker in general but have been doing research & am wondering what kind of yeast to use. I purchased active dry yeast. Will that work or do I need instant yeast?
Denise says
Hi Connie, let me know how the bread works out. Great connecting with you on FB. Let me know if you have any questions - always happy to help.
B Agnes says
It is awesome! Thank you for your recepie. I made it yesterday and it desapiered. I am making it today as well.
Denise says
It has a way of disappearing in my house too! 🙂 Thanks for sharing your good bread news with me. I've not been making another bread recipe since I discovered this. Best to you!
Gigi says
I was looking for WFPB bread and came across your recipe in Pinterest, so glad I found you! Your bread looks and sounds deli, will definitely try it out. Thanks! Stay safe & healthy!
Denise says
I'm happy you've found me 🙂 We love this recipe. It is really easy. The only difficult part is that it disappears quickly. My best to you.
Laura says
Hi Denise,
What kind of yeast do you use in this recipe? I have active dry yeast
Denise says
Hi, active dry yeast is the stuff you want, so you are in luck. Happy baking - l love this bread 🙂
Parker says
Hi, would I be able to take out the sweetener and instead use savory spices if I wanted a more savory bread? This looks delicious, I can’t wait to try it. I’m a full-time college student working a full-time job and very poor, only have a little money left after rent. I try to maintain my health by following WFPB, but it’s a challenge when you’re as poor as I am haha. I love that this doesn’t have any crazy expensive or obscure ingredients and is super easy and quick. Just what I need
Denise says
Hi Parker, it's no problem to take out the maple syrup or even cut the amount in half. I actually don't think you'd need another spice to keep this savory. Perhaps add a pinch more salt? Maybe a tablespoon of nutritional yeast, but that's more of a niche ingredient. Good luck with the bread - it's way better than store-bought. And good luck with your studies, I commend you. 🙂
Robyn Lieberman says
My packets of active dry yeast are 7 grams each, and measure just under a Tblsp,,so I used a bit more than a packet , about 10 grams. In the oven, hoping for a good result!
Denise says
I think you'll be good to go. As long as the yeast is in date and it doesn't get cold, you can do a bit of 'estimating' (at least in my experience. Fresh bread, I envy you - it's on our tomorrow to-do list. Cheers!
Brooke says
I tried to make this and their was not nearly enough water to make the flour anything I would describe as wet. It made a tough ball of hard dough that would have required lots o kneeding to make it a smooth consistency. It definitely wouldn't "pour" definitely a plop though. 2 cups of water to 4 cups of flour??
Denise says
Hi, what kind of flour did you use? We (meaning usually my husband) make this bread weekly using the 4 to 2 ratio. I'm asking about the flour because it does vary depending on the type and brand. It's possible that you need to add more water. Did the bread rise or was it to dry? Let's work through it and see what we can come up with.
Brooke says
The ingredients of the flour say whole wheat flour. It's Gold Medal Brand. I let it rise for an hour. It didn't make it to the top of the pan but it came up a little. Then I tossed it in the oven. It formed a rustic hard crust on all sides. It rolled out of the pan easily. It was very challenging to saw through the crust. The bread was very dense but the taste was good. If I knew what the dough should feel like I could adjust the water. Should it "pour" out of the bowl?
Denise says
Gold Medal shouldn't be overly heavy. My husband reminded me that when he makes it, if anything, there is a bit of water in the bottom of the bowl. The crustiness is probably because it needed more water. When you try it again (and hopefully you will). Start with the 2:4 ratio and if needed, definitely add more water. It does come out of the bowl with a consistency that is moist and pourable. Not quite a batter, but definitely not firm. Definitely, keep me posted.
Brooke says
I had to us 2.5 cups of water and let it rise for 50 minutes to get it up to the top like your photo. I also took it out of the oven 5 min early.
Denise says
I'm glad you tried it again. How did it turn out?
Brooke says
Significantly fluffier! I need to get some more yeast to try one more modification otherwise this is a great recipe. This is the first bread I have ever made. I have been cooking WFPB for 3 years now and am very happy to finally be taking the bread leap. This bread is very tasty. My kids like it too. Thanks!
Denise says
Good for you! I am so pleased you stuck with it - and congratulations! Making bread is kind of a big deal (at least it was for me). We make at least 1 loaf of this exact recipe every week. It's my husband's job now 🙂 One tip to keep in mind, be sure your bowls and pans are warm. Yeast can be really fussy.
Let me know if you have any questions - I'm here to help.
Clarice says
Can I put this in my bread machine
Denise Perrault says
Yes, It should work in the bread machine. I hope you enjoy it. 🙂
Amy says
Everyone measures differently. Do you fluff the flour first, or just dig the measuring cup into the bag? Measuring by weight is the most accurate, especially w bread.
Denise says
Hi, I scoop it directly from the bag, but you are right. We make this weekly, so next time I will weigh it and give you proper amounts. Cheers, Denise.
Steve says
Hi, Looks interesting. Just wondering: I grind my own flour. Am I right in guessing that Gold Medal flour is comparable to “pastry flour” (or the white grain rather than the red)? Thank you for sharing this recipe!
Denise says
Hi, I'm not sure about Gold Medal flour, but I use a whole wheat flour (it's a brownish color). Not the white kind. I'm sure you can use your own ground flour. If it more dense, you may need to add a little less.
Sue says
This was without a doubt the easiest bread I have ever made. Weighing the flour is imperative. I found that 520g was a little more than 3 cups here--that would explain the people who had a hard rock if they relied on scooping the flour. I also found the second time I made it, I sifted the flour and it seemed like I was using far too much water. So weighing and sifting definitely help results.
I'm experimenting with WFPB (no oil) so my purchase options were Ezekiel bread at almost $7 a loaf. Buying name brand white whole wheat flour from King Arthur, I calculated the cost of this bread at $1.50 a loaf. I also timed the process and it took me literally 12 minutes--something I'm willing to do weekly for our health. Thank you for this recipe!
Denise says
Thanks so much for your testing. I agree with the weighing of flour given the different kinds out there too. And the cost factor? Wow! That's a real motivator 🙂 I really appreciate your testing and reporting out - this is going to help a lot of folks. Cheers.
Susan Ottwell says
Keep in mind that store-bought whole wheat flour will have the wheat germ removed, since the wheat germ would go rancid during storage. So add a spoonful or two of wheat germ to your flour.
Denise says
Thanks for that reminder - it's great information and something to consider - love the idea of adding wheat germ too. Thanks 🙂
PlantBased Sue says
This is a fantastic bread, especially for beginners. You just can’t go wrong. I’ve made it with active yeast and I’ve made it with instant yeast. Both turned out great. Made it with different types of wheat flour and they all work. The only adjustment I needed was some more salt, but that’s just me. Thank you so much!
Denise Perrault says
Yahoo! I am SO happy you discovered and enjoy this bread recipe. My husband makes this weekly and we've completely stopped buying bread. It's definitely a keeper. 🙂
Dr. V says
Does this yield a 2 lb loaf?
Denise Perrault says
Hi, I've never weighed a baked loaf, but I make it in a standard-sized loaf pan and it filled it and rises as it bakes.
Anu says
can I skip maple syrup? or is there any other substitute for it?
Denise Perrault says
You can substitute maple syrup for another liquid sweetener like date paste or agave. Or use date or coconut sugar. You can skip it together, but the sugar does help the yeast activate, which is another reason I recommend it.
Jac says
I Love this recipe! I LOVE that it's oil free! I'm wondering how you would suggest making it RYE bread. Perhaps simply swapping 1 cup of the whole wheat?
Denise Perrault says
Hi, I've never tried this recipe with rye flour, but it's a great idea. I'll be doing that soon. 🙂
Kristi says
Can I make this using unbleached all purpose flour? That's all I have, and I really want some bread! 🙂
Denise Perrault says
I've not tried this recipe with all purpose flour, but I've made other bread using it. You may need to adjust the water as it's finer than whole wheat flour, so start by adding half the amount and work up from there. I'd recommend kneading it a little to get the gluten working.